A digital display can look current while showing information that is already outdated. An Arduino data freshness monitor makes that problem visible using three LEDs. Instead of simply displaying the latest number received, the circuit changes color as time passes without a new valid update. It is a practical electronics lesson in timing, serial communication, data validation, and the difference between receiving information and knowing whether it is current.
The problem appears in many places outside the classroom. Weather stations, transportation dashboards, and websites discussing real-time NFL odds all deal with information that can change between updates. A displayed number does not necessarily represent the newest available information. The linked sports website provides betting-related coverage rather than a classroom data feed, so this activity uses fictional numbers and does not require students to access gambling platforms.
The classroom project is intentionally small. An Arduino Uno receives sample readings from a computer, records when a valid message arrives, and controls green, amber, and red LEDs according to how much time has passed. The lesson is not about building a complicated Internet-connected system. It is about learning why the timing and quality of incoming information matter as much as the values themselves.
Building the Arduino Data Freshness Monitor
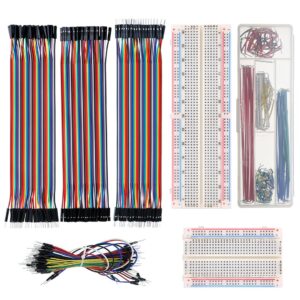
The basic design needs an Arduino Uno compatible with the Arduino IDE, a breadboard, three LEDs, three 330-ohm resistors, jumper wires, a USB cable, and a computer.
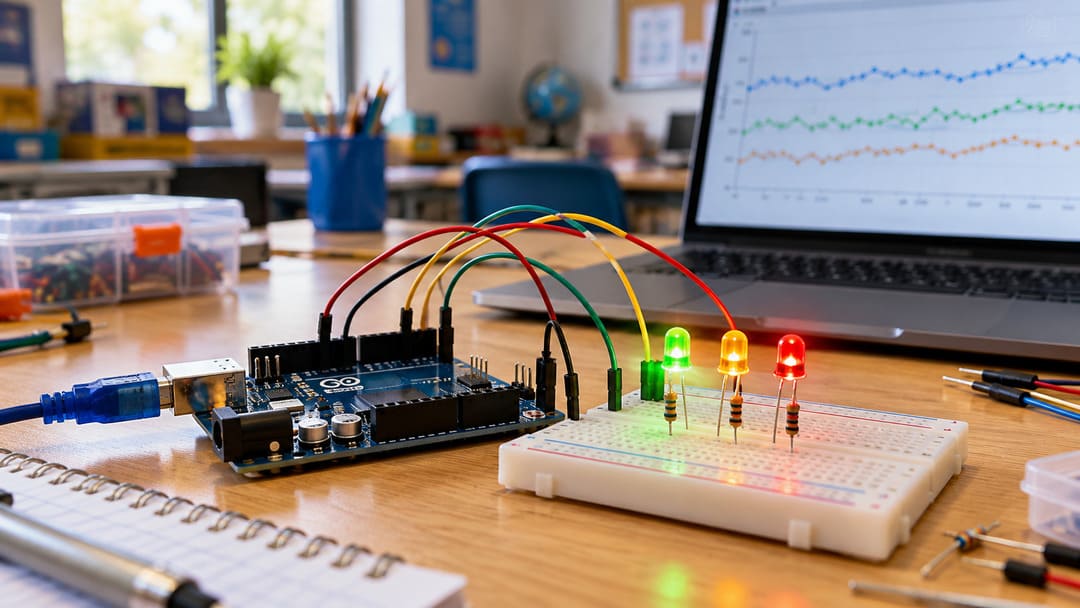
Use a green LED to represent recently received information, an amber LED to indicate that an update is becoming old, and a red LED to warn that the system has received no valid update within the configured interval.
Connect the green LED to digital pin 2, amber to pin 3, and red to pin 4. Each LED must have its own series current-limiting resistor. For a conventional 5-volt Uno setup, a 330-ohm resistor is a suitable starting point. Connect each LED’s cathode to the common ground rail, and connect its anode through the resistor to its assigned output pin.
Disconnect USB power while changing the wiring. Check LED polarity and resistor connections before powering the board.
The program will use these demonstration thresholds:
| Data condition | LED state | Interpretation |
|---|---|---|
| No valid message received | Red | No accepted data is available |
| Less than 10 seconds since a valid message | Green | The latest message arrived recently |
| 10 to under 30 seconds since a valid message | Amber | No update has arrived within the shorter interval |
| 30 seconds or longer since a valid message | Red | The update interval has been exceeded |
These thresholds are teaching settings, not universal definitions of fresh data. An industrial sensor reporting every second and a monitoring station publishing every fifteen minutes need different expectations.
For this first build, the LEDs measure time since the last accepted message, not the actual age of the original observation. That distinction becomes central to the experiment.
Make the LEDs Respond Without Pausing the Program
An Arduino must perform two jobs simultaneously: listen for incoming messages and update the LEDs as time passes.
The Arduino IDE’s Serial Monitor tool provides a straightforward way to simulate data arriving from another system. A teacher can type a sample value, send it over USB, and observe how the microcontroller responds.
Configure the program to initialize serial communication at 9,600 baud and use the same setting in Serial Monitor. For a simple exercise, require each input to be a complete line containing an integer between 0 and 100. A line such as 42 is valid, while an empty line or the text forty-two is rejected.
The program should keep track of whether any valid message has arrived and store the receipt time of the most recent accepted message. Every pass through the main loop, it compares the current running time with that stored value and activates only the appropriate LED.
A conventional Arduino program often uses delay() to keep an LED illuminated for a set interval. That is inconvenient here because a long blocking delay can prevent the program from promptly processing new messages.
Arduino’s official Blink Without Delay example demonstrates the alternative: use millis() to check elapsed time while allowing the program to continue running.
For the monitor, the essential logic is straightforward:
- On startup, illuminate red until a valid message arrives.
- When a complete, valid message is received, record the current
millis()value. - Calculate elapsed time using the difference between the current reading and the stored receipt time.
- Select green, amber, or red according to the thresholds.
- Ignore malformed messages rather than treating them as successful updates.
Use an unsigned long variable for the millis() readings and calculate elapsed time by subtraction, following Arduino’s timing pattern. This also supports correct elapsed-time comparisons across the normal timer rollover when implemented consistently.
The result is a monitoring program that continues checking its inputs instead of stopping for ten or thirty seconds.
Test What Happens When Updates Stop
Once the circuit is wired and the timing logic is working, students can test it without connecting to the Internet.
Start the Arduino and confirm that the red LED remains illuminated. This establishes the correct initial condition: the board has no accepted information.
Send 42 through Serial Monitor. The green LED should illuminate immediately after the complete line is validated.
Stop sending messages. When ten seconds have elapsed since that message, the amber LED should replace the green one. Once thirty seconds have elapsed, the red LED should illuminate.
Now send 42 again.
The program should return to green because it has received a new valid message, even though the numerical value is unchanged. That outcome provides an important discussion point: two observations can have identical values without being the same observation.
Next, send an invalid input such as hello. The program should reject it and leave the previous valid receipt time unchanged.
A system that resets its freshness timer whenever any message arrives could be fooled by repeated errors or meaningless traffic. Input validation helps prevent that failure.
Teachers can assess the exercise by asking students to explain what each LED actually proves. A green light establishes only that a syntactically valid message was recently received. It does not establish that the underlying measurement was recent, accurate, or independently verified.
Why a Recent Message Can Still Contain Old Data
The most useful extension is to distinguish two timestamps: when a measurement was produced and when the Arduino received it.
Suppose a computer sends a temperature reading that was recorded five minutes earlier. The Arduino receives the message successfully and immediately turns green.
The serial connection is working, but the information is already five minutes old.
For a more realistic classroom system, the sending computer can include the age of the observation in seconds alongside the value. The Arduino then adds the elapsed time since receipt to the reported observation age. This allows the display to represent the age of the underlying reading rather than merely the age of the latest message.
For example, if an observation was already 120 seconds old when received, its calculated age would begin at 120 seconds rather than zero. Under the demonstration’s 30-second red threshold, it should immediately be considered stale.
This is a different engineering problem from generating a random value.
The site’s earlier Arduino randomizer project teaches how a microcontroller can simulate unpredictable outcomes. A freshness monitor instead asks whether an incoming value has sufficient timing information to support a decision.
Randomness, measurement, and information freshness are separate concepts. Understanding their differences helps students avoid treating every changing digital output as evidence of new information.
Connect the Lesson to Real Monitoring Systems
Once the manual test works, instructors can replace fictional readings with carefully chosen public measurements.
The USGS Water Data APIs are one possible extension. They provide machine-readable information from monitoring locations, including continuous water measurements and their associated observation information.
An instructor-controlled computer can retrieve an appropriate observation, prepare the data, and send the value and its observation age to the Arduino over USB. A basic Uno does not need its own Internet connection for this arrangement because the computer handles the network request.
The important requirement is to choose freshness thresholds that make sense for the selected data source. A stream gauge that normally reports at multi-minute intervals should not automatically trigger an alarm after ten seconds without another measurement.
Students should examine when the measurement was taken, whether its timestamp is present, whether the expected reporting interval has passed, and what the system should show when no valid observation is available.
A related Stamps in Class guide on smart energy management with AI and IoT kits explores the larger challenge of working with sensors, connected equipment, and control decisions. A classroom freshness monitor isolates one of those challenges before students attempt a more complex connected system.
For an advanced exercise, students can compare three cases: a healthy data source that reports on schedule, a source that repeats an old observation, and a source that stops transmitting entirely.
Those cases should not all produce the same result. A robust display must distinguish recent communication from recent observation, and missing data from a measurement that has genuinely remained constant.
What the Completed Project Should Teach
A successful Arduino data freshness monitor does more than illuminate three lights. It reveals assumptions that ordinary dashboards often hide.
Students begin with a simple hardware rule: green means recent, amber means delayed, and red means no acceptable recent update. Testing then shows why that rule needs additional context. A newly received message may contain an old measurement, a malformed packet should not reset the timer, and the correct timeout depends on how frequently the source normally reports.
The finished circuit provides a foundation for more advanced work in sensor networks, industrial monitoring, environmental measurements, and connected devices.
Most importantly, it teaches a habit that applies well beyond electronics: before trusting a displayed value, determine what was measured, when it was measured, and whether the information is still useful for the decision being made.