Electricity is invisible. When a circuit fails, staring at the wires rarely reveals the actual problem. You need a way to measure the voltage and track the exact path of the current. Learning how to choose your first multimeter gives you the ability to diagnose hardware issues logically instead of simply guessing. This diagnostic tool sits at the center of every electronic workbench, acting as your eyes when dealing with invisible energy.
Auto-Ranging Versus Manual Ranging
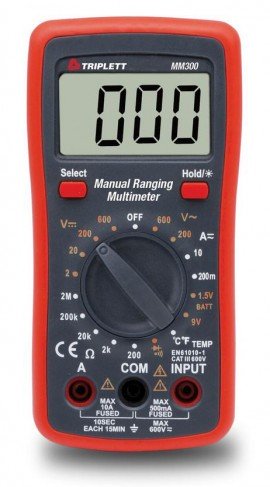
Meters come in two primary styles based on how they scale measurements. A manual ranging meter forces you to guess the approximate voltage before you take a reading. If you measure a nine-volt battery, you must turn the physical dial to the twenty-volt setting. Guessing incorrectly gives you a frustrating error or a decimal reading that is hard to interpret.
An auto-ranging meter handles this scaling automatically. You simply turn the dial to the general voltage mode, touch the metal probes to your circuit, and the internal computer figures out the exact decimal placement. For new builders following structured beginner electronics lesson plans, an auto-ranging device removes a massive layer of confusion. You focus entirely on testing your breadboard rather than fighting the settings on your testing equipment. Reading a comprehensive multimeter usage guide clarifies exactly how these different dials behave when connected to live power.
Essential Testing Functions to Look For
A professional meter includes dozens of highly specialized modes. As a beginner, you only need three core functions to build and repair basic circuits safely. You need direct current (DC) voltage to check your batteries, resistance to verify your components, and continuity to find broken wires. Continuity acts as the most frequently used mode on any desk. It sends a tiny electrical pulse down a wire. If the wire is perfectly intact, the meter emits a loud beep.
This audible feedback speeds up your troubleshooting process dramatically. You test long jumper wires and complex breadboard paths without ever looking away from your hands.
| Mode | Primary Purpose | Real-World Application |
| DC Voltage | Measures electrical pressure | Checking if a battery is dead before starting a build |
| Resistance | Measures current restriction | Verifying resistor values before wiring LEDs |
| Continuity Beep | Checks for a complete physical path | Finding hidden breaks inside jumper wires |
Fuses and Hardware Safety Ratings
Safety matters immediately, even when you only work with small batteries. A reliable meter includes internal glass fuses. If you accidentally probe a circuit incorrectly and cause a massive power spike, the internal fuse blows and breaks the circuit. This sacrifices a cheap glass tube instead of destroying the expensive computer chip inside the meter or burning your hand.
You also want to look for the safety rating printed directly on the plastic case. The industry standard uses a Category, or CAT, rating system. A CAT II or CAT III rating means the manufacturer tested the plastic housing and internal wiring to withstand sudden electrical surges safely. Reviewing a detailed multimeter safety overview explains how these specific ratings protect you from accidental arc flashes. While your small desk projects lack the power to cause serious harm, buying a properly rated tool builds safe testing habits early.
Evaluating Probes and Screen Quality
The physical probes connect you to your circuit. Cheap, stiff probes make testing tiny breadboard pins frustrating. You want probes with flexible silicone wires and sharp metal tips. The sharp tips allow you to touch a single leg of a microchip without accidentally bridging the connection to the pin next door and causing a short circuit.
Finally, evaluate the digital display before you buy. A large, backlit screen makes reading values much easier when your desk lamp casts heavy shadows over your workspace. You spend a lot of time looking at these numbers while adjusting components. A clear screen prevents you from misreading a decimal point and sending the wrong voltage through your fragile sensors. Buying a reliable testing tool transforms frustrating circuit failures into simple, solvable puzzles.