If you’ve ever built a simple breadboard project—an LED flasher, a buzzer alarm, or a small motor spinner—you’ve used a battery as the “heart” of the circuit. Batteries seem simple: put them in, and the project turns on. But batteries are actually little chemical power plants, and understanding how they work will make you much better at building (and troubleshooting) electronics kits.
What a Battery Actually Does
In electronics, we talk about voltage (the “push” that moves electricity) and current (the “flow” of electricity). A battery’s job is to provide a steady voltage so current can move through your circuit.
A battery doesn’t “store electricity” like a bucket stores water. Instead, it stores chemical energy. When you connect the battery to a circuit, chemical reactions inside the battery create an electrical imbalance that pushes electrons through the wires and parts in your kit.
Think of it like this:
- Chemistry inside the battery creates pressure (voltage).
- Your circuit provides a path.
- Electrons flow through that path as current.
- Components (LEDs, resistors, chips, motors) use that energy to do something useful.
Inside a Battery: The Two Sides and the “Chemical Engine”
Every battery has three main parts:
- Anode (negative side)
This is where a reaction releases electrons. - Cathode (positive side)
This is where electrons are accepted. - Electrolyte
A material that allows ions (charged atoms) to move inside the battery.
Here’s the key idea:
Electrons travel through your circuit on the outside, while ions move through the electrolyte on the inside.
Both flows are needed for the battery to keep working.
When the battery is fresh, the chemical reactions happen easily, so voltage stays close to the rated value (like 1.5V for an AA alkaline, or 9V for a rectangular 9V). As the chemicals are used up, the reactions slow down, voltage drops, and your circuit starts acting weird—dim LEDs, weak buzzers, resetting microcontrollers, or motors that won’t spin.
Voltage vs Current: A Beginner-Friendly Breakdown
A common beginner mistake is thinking “more volts always means more power.” Not exactly.
- Voltage (V) is the push.
- Current (A) is the flow rate.
- Power (W) is how much work you’re doing:
Power = Voltage × Current
So a 9V battery sounds strong, but many 9V batteries can’t provide much current. That matters a lot in kits.
Example: Why a 9V Battery Can Disappoint
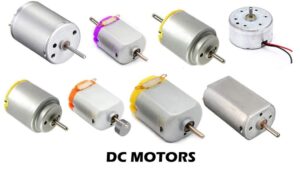
A little DC motor might need a burst of current to start spinning. A 9V battery’s voltage is high, but it often can’t supply that burst well, so the motor stutters or stops. Meanwhile, a pack of AA batteries might be “only” 6V (4×1.5V), but it can usually provide much more current, so the motor runs better.
Battery Capacity: How Long It Lasts
Battery life is usually described with capacity, often measured in:
- mAh (milliamp-hours) for small batteries
- Ah (amp-hours) for bigger packs
A simple way to think about it:
- A battery rated 1000 mAh could (in theory) provide 1000 mA for 1 hour, or 100 mA for 10 hours, and so on.
Real life is messier because capacity depends on how fast you drain it, temperature, and battery type. But it’s still a useful guide for electronics kits.
The “Hidden” Battery Spec That Causes Most Kit Problems: Internal Resistance
Batteries aren’t perfect. Inside every battery is something like a tiny resistor called internal resistance. When your circuit tries to draw a lot of current, the internal resistance causes the battery voltage to drop.
That drop is called voltage sag.
Voltage sag is why:
- an LED circuit may dim when a motor turns on,
- a microcontroller may reset when a buzzer sounds,
- a “working” project suddenly acts broken even though the wiring is fine.
In electronics kits, this is huge. Many projects look like “logic” circuits (on/off, blinking, beeping), but they still depend on stable power.
Why Batteries Matter So Much in Electronics Kits
When you’re learning electronics, your projects fall into a few common categories. Each category puts a different demand on the battery.
1) LED and resistor projects (low power, forgiving)
These usually draw small currents. Almost any battery works, as long as the voltage matches what the LED needs and you use a resistor.
Common symptoms of low battery: dimmer LEDs, slower blinking.
2) Integrated circuits and microcontrollers (needs clean, steady voltage)
Chips like timers, logic ICs, and microcontrollers can misbehave if voltage dips even briefly.
Common symptoms of weak batteries:
- random resets,
- flickering displays,
- “it worked yesterday, now it doesn’t.”
3) Motors, servos, and speakers (high current, not forgiving)
These components can pull big bursts of current, especially when starting up.
Common symptoms of poor battery choice:
- motor won’t start,
- sound is weak or crackly,
- everything else dims when the motor turns on.
Battery Types You’ll See in Beginner Kits
Alkaline (AA, AAA, 9V)
- Great for simple projects
- Not rechargeable
- Voltage starts high and slowly drops
Rechargeable NiMH (AA, AAA)
- Rechargeable and good current delivery
- Slightly lower voltage per cell (about 1.2V instead of 1.5V)
- Often better for motors than alkalines
Lithium-ion / Lithium-polymer (Li-ion / LiPo)
- High energy density and strong power output
- Rechargeable
- Needs safe charging and protection circuits (important!)
For beginner kits, AAs are popular because they’re simple and safe. LiPo packs are common in robotics and more advanced kits because they’re lightweight and powerful—but they require respect and correct charging equipment.
Series vs Parallel: Changing Voltage and Runtime
A lot of kits use multiple batteries. How they’re wired changes everything.
Batteries in Series (end-to-end)
- Voltage adds up
- Capacity stays the same
- Example: 2×AA in series ≈ 3V
Batteries in Parallel (side-by-side)
- Voltage stays the same
- Capacity adds up (longer runtime)
- Example: 2×AA in parallel ≈ 1.5V but lasts longer
Most beginner battery holders are series because many circuits need 3V, 4.5V, or 6V.
Quick Troubleshooting: “Is It My Circuit or the Battery?”
If a project acts strange, check power first. Here are fast clues:
- LEDs are dim: battery low or resistor too large (but battery is common)
- Motor won’t start: battery can’t supply current (try fresh AAs or NiMH)
- Microcontroller resets when something turns on: voltage sag from current spikes
- Works on USB power but not on battery: battery choice is weak or wiring is causing a drop
If you have a multimeter, measure the battery voltage while the circuit is running. A battery that reads “fine” with no load can collapse under load.
Why This Knowledge Makes You Better at Electronics
Understanding batteries helps you:
- choose the right power source for each project,
- avoid confusing “ghost problems,”
- protect components from undervoltage and brownouts,
- build more reliable kits that work the first time.
Batteries aren’t just an accessory. In an electronics kit, the battery is part of the design. When you treat power like a real component—not an afterthought—your projects become more consistent, more professional, and a lot more fun to build.