A temperature monitor is one of the best beginner electronics projects because it takes a measurement you already understand from daily life and turns it into something you can build on a breadboard. Instead of only creating light or sound, you create a circuit that responds to a changing condition in the real world. That makes the project feel practical right away.
It also teaches an important shift in thinking. A lot of first electronics projects are about outputs: turn on an LED, sound a buzzer, spin a motor. A temperature monitor introduces input, which means the circuit is now reading information from its environment. That is a major step forward for beginners because it shows how electronics becomes useful, not just interesting.
For a first version, the goal is not to build a laboratory-grade thermometer. The goal is to understand how a sensor behaves, how to wire it cleanly, and how to turn its signal into something meaningful you can observe.
Why A Temperature Monitor Is A Strong Beginner Project
The best beginner projects are simple enough to finish but rich enough to teach more than one idea. A temperature monitor does that well because it combines power, measurement, and response in one build. You learn that a sensor is not magic. It is a component whose electrical behavior changes in a way that the rest of the circuit can use.
This kind of project also scales naturally. The first version might only light an LED when the temperature passes a certain point, or send readings to a basic microcontroller display. Later, that same idea can grow into room monitoring, fan control, greenhouse projects, or weather-related experiments.
That progression makes temperature sensing a smart next step after breadboard basics, buzzer circuits, and simple motion detection.
What A Basic Temperature Sensor Does
A basic temperature sensor converts heat changes into an electrical change that a circuit can read. Depending on the sensor, that change may be resistance, voltage, or a digital signal. For beginners, the important idea is simpler than the technical details: as temperature changes, the sensor’s output changes too.
One of the most beginner-friendly ways to start is with a common analog temperature sensor or thermistor-based setup. A thermistor changes resistance with temperature, which means the circuit can detect warming and cooling by measuring how that resistance shifts. Other beginner-friendly sensors output a voltage that tracks temperature more directly.
The reason this matters educationally is that it shows beginners how components can represent real-world conditions electrically. Once that idea clicks, many other sensors become easier to understand.
The Parts You Need
A simple temperature monitor project usually starts with a breadboard, jumper wires, a low-voltage power source, and a basic temperature sensor. Depending on how you want the project to behave, you might also use an LED, resistor, buzzer, or beginner microcontroller board to display or react to the reading.
For a first build, keeping the circuit modest is the better choice. A clean project with one sensor and one clear output teaches more than a cluttered design with too many add-ons. The point is to understand how the sensor fits into the circuit, not to make the most advanced monitor possible on day one.
If the build is happening on a breadboard, it helps to already be comfortable with rails, rows, and component placement. That is why a simple breadboard LED circuit still makes a strong internal reference point for learners moving into sensor projects.
How The Circuit Works
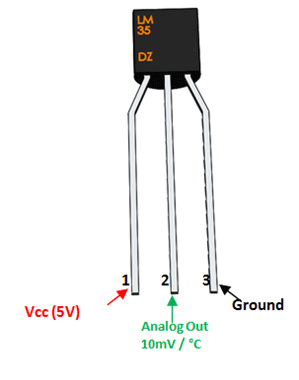
A temperature monitor circuit works by taking the sensor’s changing electrical behavior and turning it into a readable result. In the simplest version, the sensor is wired into a circuit where temperature changes affect the voltage or resistance seen by the rest of the system. That change can then trigger an output, shift a reading, or be interpreted by a controller.
For beginners, it helps to think of the sensor as the “input source” and the rest of the circuit as the “decision or display side.” The sensor does not usually do anything dramatic by itself. It provides information. The circuit turns that information into action.
This is what makes the project conceptually useful. You are no longer only learning how to power a part. You are learning how electronics can notice conditions and respond accordingly.
A Simple Beginner Build Path
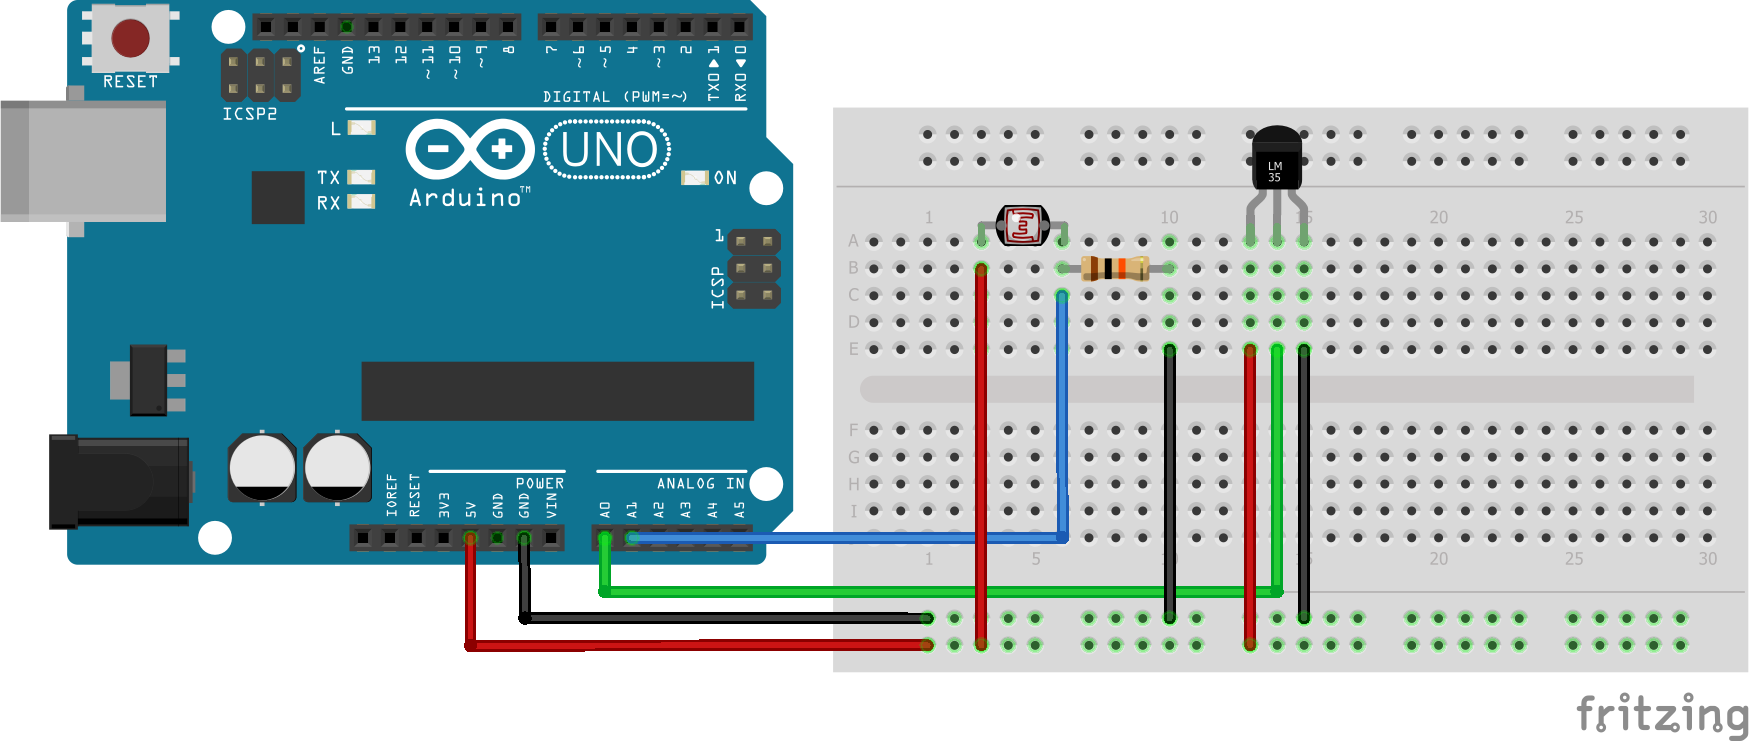
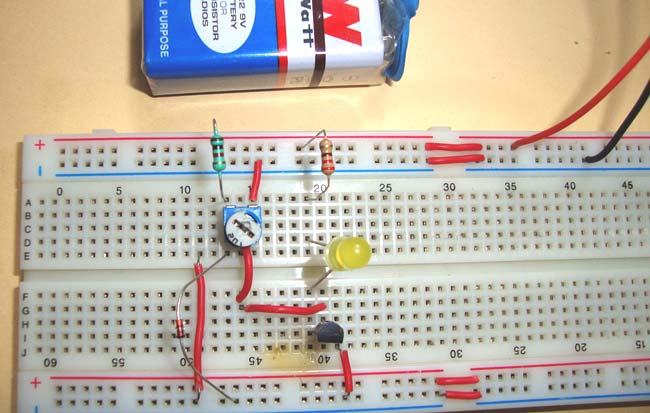
A clean first approach is to connect the temperature sensor on a breadboard, provide it with safe low-voltage power, and route its signal into a simple output system. That output might be a microcontroller reading, an LED threshold indicator, or another beginner-friendly response.
The most important part of the build is not complexity. It is organization. Place the sensor so its pins are easy to trace, keep jumper runs short, and make sure power and ground are clearly separated. A lot of beginner sensor problems come from layout mistakes rather than misunderstanding the concept.
If you are using a threshold-style design, where the circuit reacts once the temperature crosses a certain point, make sure you understand whether the sensor’s value rises or falls with heat. That relationship determines how the rest of the circuit should interpret the signal.
Analog Sensors Vs Digital Sensors For Beginners
Not every temperature sensor behaves the same way, and knowing the difference helps beginners choose the right starting point.
| Sensor Type | How It Behaves | Best For |
|---|---|---|
| Thermistor | Resistance changes with temperature | Learning sensor behavior and simple analog circuits |
| Analog temperature sensor | Voltage changes with temperature | Easy beginner monitoring projects |
| Digital temperature sensor | Sends processed data in a digital format | Later projects with microcontrollers |
A thermistor-based project is strong for understanding fundamentals because it makes the sensor’s role inside the circuit easier to grasp. A digital sensor can be easier to read in code, but it can hide some of the analog behavior that makes beginner electronics so educational.
That is why the best choice depends on the lesson. If the goal is to understand what a sensor is doing electrically, analog is often the better teacher.
Why Layout And Stability Matter In Sensor Projects
Sensor circuits often reveal the difference between “mostly connected” and “correctly connected.” A buzzer project might still make some sound even when the layout is messy. A temperature monitor is less forgiving because the signal you are working with may be subtle.
Loose breadboard contacts, bad jumper placement, confused grounding, or unstable power can all make the sensor appear inaccurate or inconsistent. That does not always mean the sensor is defective. It often means the circuit needs cleaner physical organization.
This is one reason beginners sometimes think sensors are harder than they really are. In reality, they are just less dramatic than outputs. You are not always rewarded with an obvious blink or sound. Sometimes you are looking for a small, meaningful change.
What A Temperature Monitor Can Teach Beyond Temperature
The project may look simple on the surface, but it teaches several deeper skills at once. It introduces sensor logic, reinforces clean breadboard technique, and builds the idea that a circuit can respond to measured conditions instead of only direct human input.
It also teaches patience. A temperature sensor does not change state as instantly as a pushbutton. You may need to warm the sensor gently with your hand, move it into a different environment, or compare readings over a short period to see how the circuit responds. That slower feedback loop is useful because it trains beginners to observe changes rather than just trigger them.
Common Problems And What They Usually Mean
When a beginner temperature monitor does not behave as expected, the first thing to question is usually the setup, not the idea. A reversed sensor pinout, incorrect resistor value, weak breadboard connection, or misunderstanding of the sensor type can all make the build seem broken.
If the readings do not change at all, check that the sensor is powered correctly and placed in the right orientation. If the readings jump around or seem unstable, the issue may be loose connections or noisy layout. If the output always seems “on” or always seems “off,” the threshold logic or reference values may need adjustment.
This is where beginners often improve quickly, because the project teaches that troubleshooting is not random. It is a process of checking assumptions one by one.
Safe Testing Still Matters
Even though this is a low-voltage beginner project, good testing habits still matter. Build with the power off, check all rows and rails before turning anything on, and avoid changing wires while the circuit is live. If you are warming the sensor to test it, use safe and gentle methods rather than anything extreme.
A temperature monitor is a good reminder that “safe electronics” does not only mean avoiding high voltage. It also means protecting your parts, your tools, and your workflow from unnecessary mistakes. That mindset becomes more important as projects get more advanced.
A Good External Resource For Going Further
Once the first version of the project is working, a helpful next reference is the Arduino temperature sensor guide because it shows how beginners can extend simple temperature sensing into measured readings and more interactive builds. It fits naturally as a next step for learners who want to move from basic sensor behavior into programmable monitoring.
Where This Project Fits In The Learning Path
A temperature monitor fits best after a beginner already understands basic circuits, breadboards, and simple outputs. It is one of the clearest bridges from “I can wire a circuit” to “I can build a system that responds to the world.”
That makes it more than just another project. It becomes a marker of progress. Once a beginner can build, test, and understand a basic sensor-driven circuit, a much wider range of electronics starts to feel accessible.
Why This Project Is Worth Building Early
A good beginner electronics project should do more than look successful. It should expand the way the builder thinks. A temperature monitor does exactly that because it introduces sensing, measurement, and response without requiring an overwhelming amount of complexity.
It is still simple enough for a breadboard, still safe enough for low-voltage learning, and still clear enough to troubleshoot without getting lost. But it also points toward larger ideas: automation, environmental monitoring, data logging, and smarter circuits.
That is why this project belongs early in the Stamps in Class learning flow. It gives beginners a practical reason to care about sensors, and once that happens, the rest of electronics starts to open up.