A PIR motion detector is one of the most useful beginner electronics projects because it takes a real-world sensing task and reduces it to a simple idea: when movement is detected, the circuit changes state. PIR stands for passive infrared, and these sensors are designed to detect changes in infrared energy, which is why they are commonly used to notice people moving through a space. They are widely used because they are low-power, inexpensive, and easy to connect in simple projects.
For beginners, this project sits in a sweet spot between “basic circuit” and “real application.” You are still working with safe, low-voltage electronics, but the result feels more like a real device than a practice exercise. That fits naturally with Stamps in Class, which already emphasizes approachable, hands-on builds for kids and beginners through breadboards, safe power choices, and starter projects.
What A PIR Sensor Actually Detects
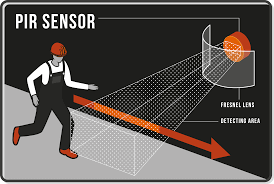
A PIR sensor does not measure distance the way an ultrasonic sensor does, and it does not “see” images like a camera. Instead, it monitors changes in infrared radiation across its sensing zones. When a warm object such as a person moves across those zones, the sensor detects a differential change and its output switches state. That is why PIR sensors are best at detecting motion across the field of view, not a perfectly still person standing in one spot.
This matters because it helps beginners understand what the project can and cannot do. A PIR sensor is excellent for triggering a buzzer, light, or microcontroller input when someone walks by, but it is not the same thing as a precision rangefinder or a full security camera. The clearer that distinction is, the easier the project is to troubleshoot.

Why This Is A Good Beginner Build
The best beginner projects give immediate feedback without requiring complicated wiring. A PIR-based motion detector does exactly that. You provide power, wire the output to a simple response device or control point, and then test it by moving in front of the sensor. The result is easy to understand because the output changes when motion is detected. SparkFun’s hookup guidance and Adafruit’s PIR overview both emphasize that these sensors are simple to power and easy to integrate into starter circuits.
It is also a project with room to grow. The first version can trigger an LED or buzzer. Later, the same sensor can be connected to a microcontroller, used in a room alarm, or added to a light-activated project. That progression makes it a better long-term learning project than a one-off novelty build.
The Parts You Need
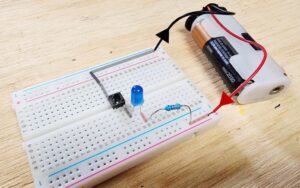
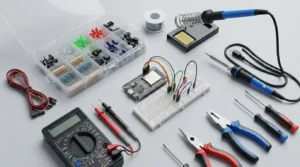
A simple beginner build usually needs a PIR sensor module, a breadboard, jumper wires, a low-voltage power source, and an output such as an LED or active buzzer. Many PIR modules are designed to be beginner-friendly because the sensor electronics are already built onto a small board with power, ground, and output pins clearly labeled. That makes them much easier to use than trying to work directly with the raw sensing element.
For a first project, the cleanest goal is not to build a full alarm system. It is to make the sensor trigger one clear response. That keeps the wiring simple and makes troubleshooting much easier.
How The Circuit Works
The logic of the circuit is straightforward. The PIR sensor is powered by the supply, and its output pin changes when motion is detected. That output can be used to drive an indicator or feed a digital input on a controller. Adafruit notes that a PIR sensor module behaves like a digital output in beginner projects, and SparkFun describes the sensor output as a signal that changes when a moving object is detected in the sensing area.
That simple output behavior is why PIR sensors are so beginner-friendly. You do not need to interpret a complex analog signal to get started. You just need to know when the sensor has switched from “idle” to “motion detected.”
A Clean Beginner Wiring Plan
The easiest version of this project is a PIR sensor feeding a buzzer or LED indicator. Connect the PIR module’s power pin to your positive supply rail, connect ground to the ground rail, and then route the sensor’s output pin to your chosen indicator path. If you are connecting it to a microcontroller later, that same output can go to a digital input instead. Typical PIR modules are designed for exactly this kind of simple hookup.
If you want a simpler sound-based version after the sensor is working, this project pairs naturally with a buzzer alarm circuit because the PIR output can become the trigger that activates the alarm.
PIR Sensor Behavior Can Feel Strange At First
One reason beginners get confused is that PIR sensors do not always respond instantly in the way a pushbutton does. Many modules include a short startup period after power is applied, and many also include onboard timing or retrigger settings that affect how long the output stays active after motion is detected. Adafruit specifically notes retriggering behavior on common PIR modules, and SparkFun’s hookup materials also describe timing and output behavior as part of normal use.
That is not a flaw. It is part of how the sensor is meant to work. A PIR module is designed to make motion detection practical, not instantaneous in the same way as a switch. If the sensor seems to “stay on” briefly after movement, that is often normal behavior rather than bad wiring.
Motion Across The Sensor Usually Works Better Than Motion Straight Toward It
A useful testing tip is to walk across the sensing area instead of directly toward the sensor. Because PIR modules respond to changes across their sensing zones, sideways motion often creates a more obvious trigger than very slow forward motion. Adafruit’s explanation of how the dual sensing elements work helps clarify why movement across the field tends to produce a stronger response.
This is one of those details that makes a project feel “broken” until you understand what the sensor is really measuring. Once you do, the behavior makes much more sense.
Common Problems And What They Usually Mean
If the motion detector never triggers, the first things to check are power, ground, and output pin placement. When the motion detector triggers randomly, the issue may be environmental movement, unstable power, or a sensor timing setting rather than a bad module. When it seems unresponsive, the startup delay or the direction of motion may be the real cause. These are all common beginner issues covered in PIR hookup references.
Breadboard layout also matters more than people expect. Loose jumpers and confused power rails can make a perfectly good sensor appear unreliable. That is why clean wiring and careful testing matter just as much here as they do in simpler breadboard projects.
Safe Testing Matters
Even though PIR projects are usually low-voltage and beginner-safe, you still want good habits. Build with the power disconnected, inspect the rows and rails before switching power on, and make one change at a time when troubleshooting. Stamps in Class already stresses safe low-voltage practices and careful testing for beginner electronics, and that same mindset applies here.
PIR sensors are beginner-friendly partly because they let you work with motion detection without moving anywhere near household mains wiring. That makes them a much safer first step into sensing projects than trying to jump immediately into wall-powered security devices.
A Quick Comparison Of What The PIR Sensor Adds
| Build Type | What It Teaches | Best Beginner Benefit |
|---|---|---|
| Button-controlled circuit | Manual input and output logic | Easy first cause-and-effect learning |
| PIR motion detector | Automatic sensing and triggered output | Introduces real-world sensor behavior |
| PIR plus buzzer or LED | Sensor-triggered response | Makes motion detection visible or audible |
| PIR plus microcontroller | Sensing plus code logic | Best next step after breadboard basics |
This is why PIR projects are such a smart bridge between simple circuits and more advanced systems. They introduce sensing without forcing beginners into too much complexity at once.
A Good External Resource For Going Further
For readers who want a reliable reference after the first build, the SparkFun PIR hookup guide is a strong next step because it explains wiring, output behavior, and practical setup details in a way that matches beginner learning.
Why This Project Belongs Early In The Learning Path
A PIR motion detector is a strong early project because it teaches a deeper lesson than “make something turn on.” It teaches that circuits can respond to the environment. That is a major shift in how beginners think about electronics. Instead of a circuit only doing what you manually tell it to do, it starts reacting to the world around it.
That is what makes this project worth building. It is still simple enough for a breadboard and beginner-safe power, but it opens the door to alarms, automatic lighting, counters, and smarter systems later on. For a first sensor project, that is exactly the kind of progression you want.