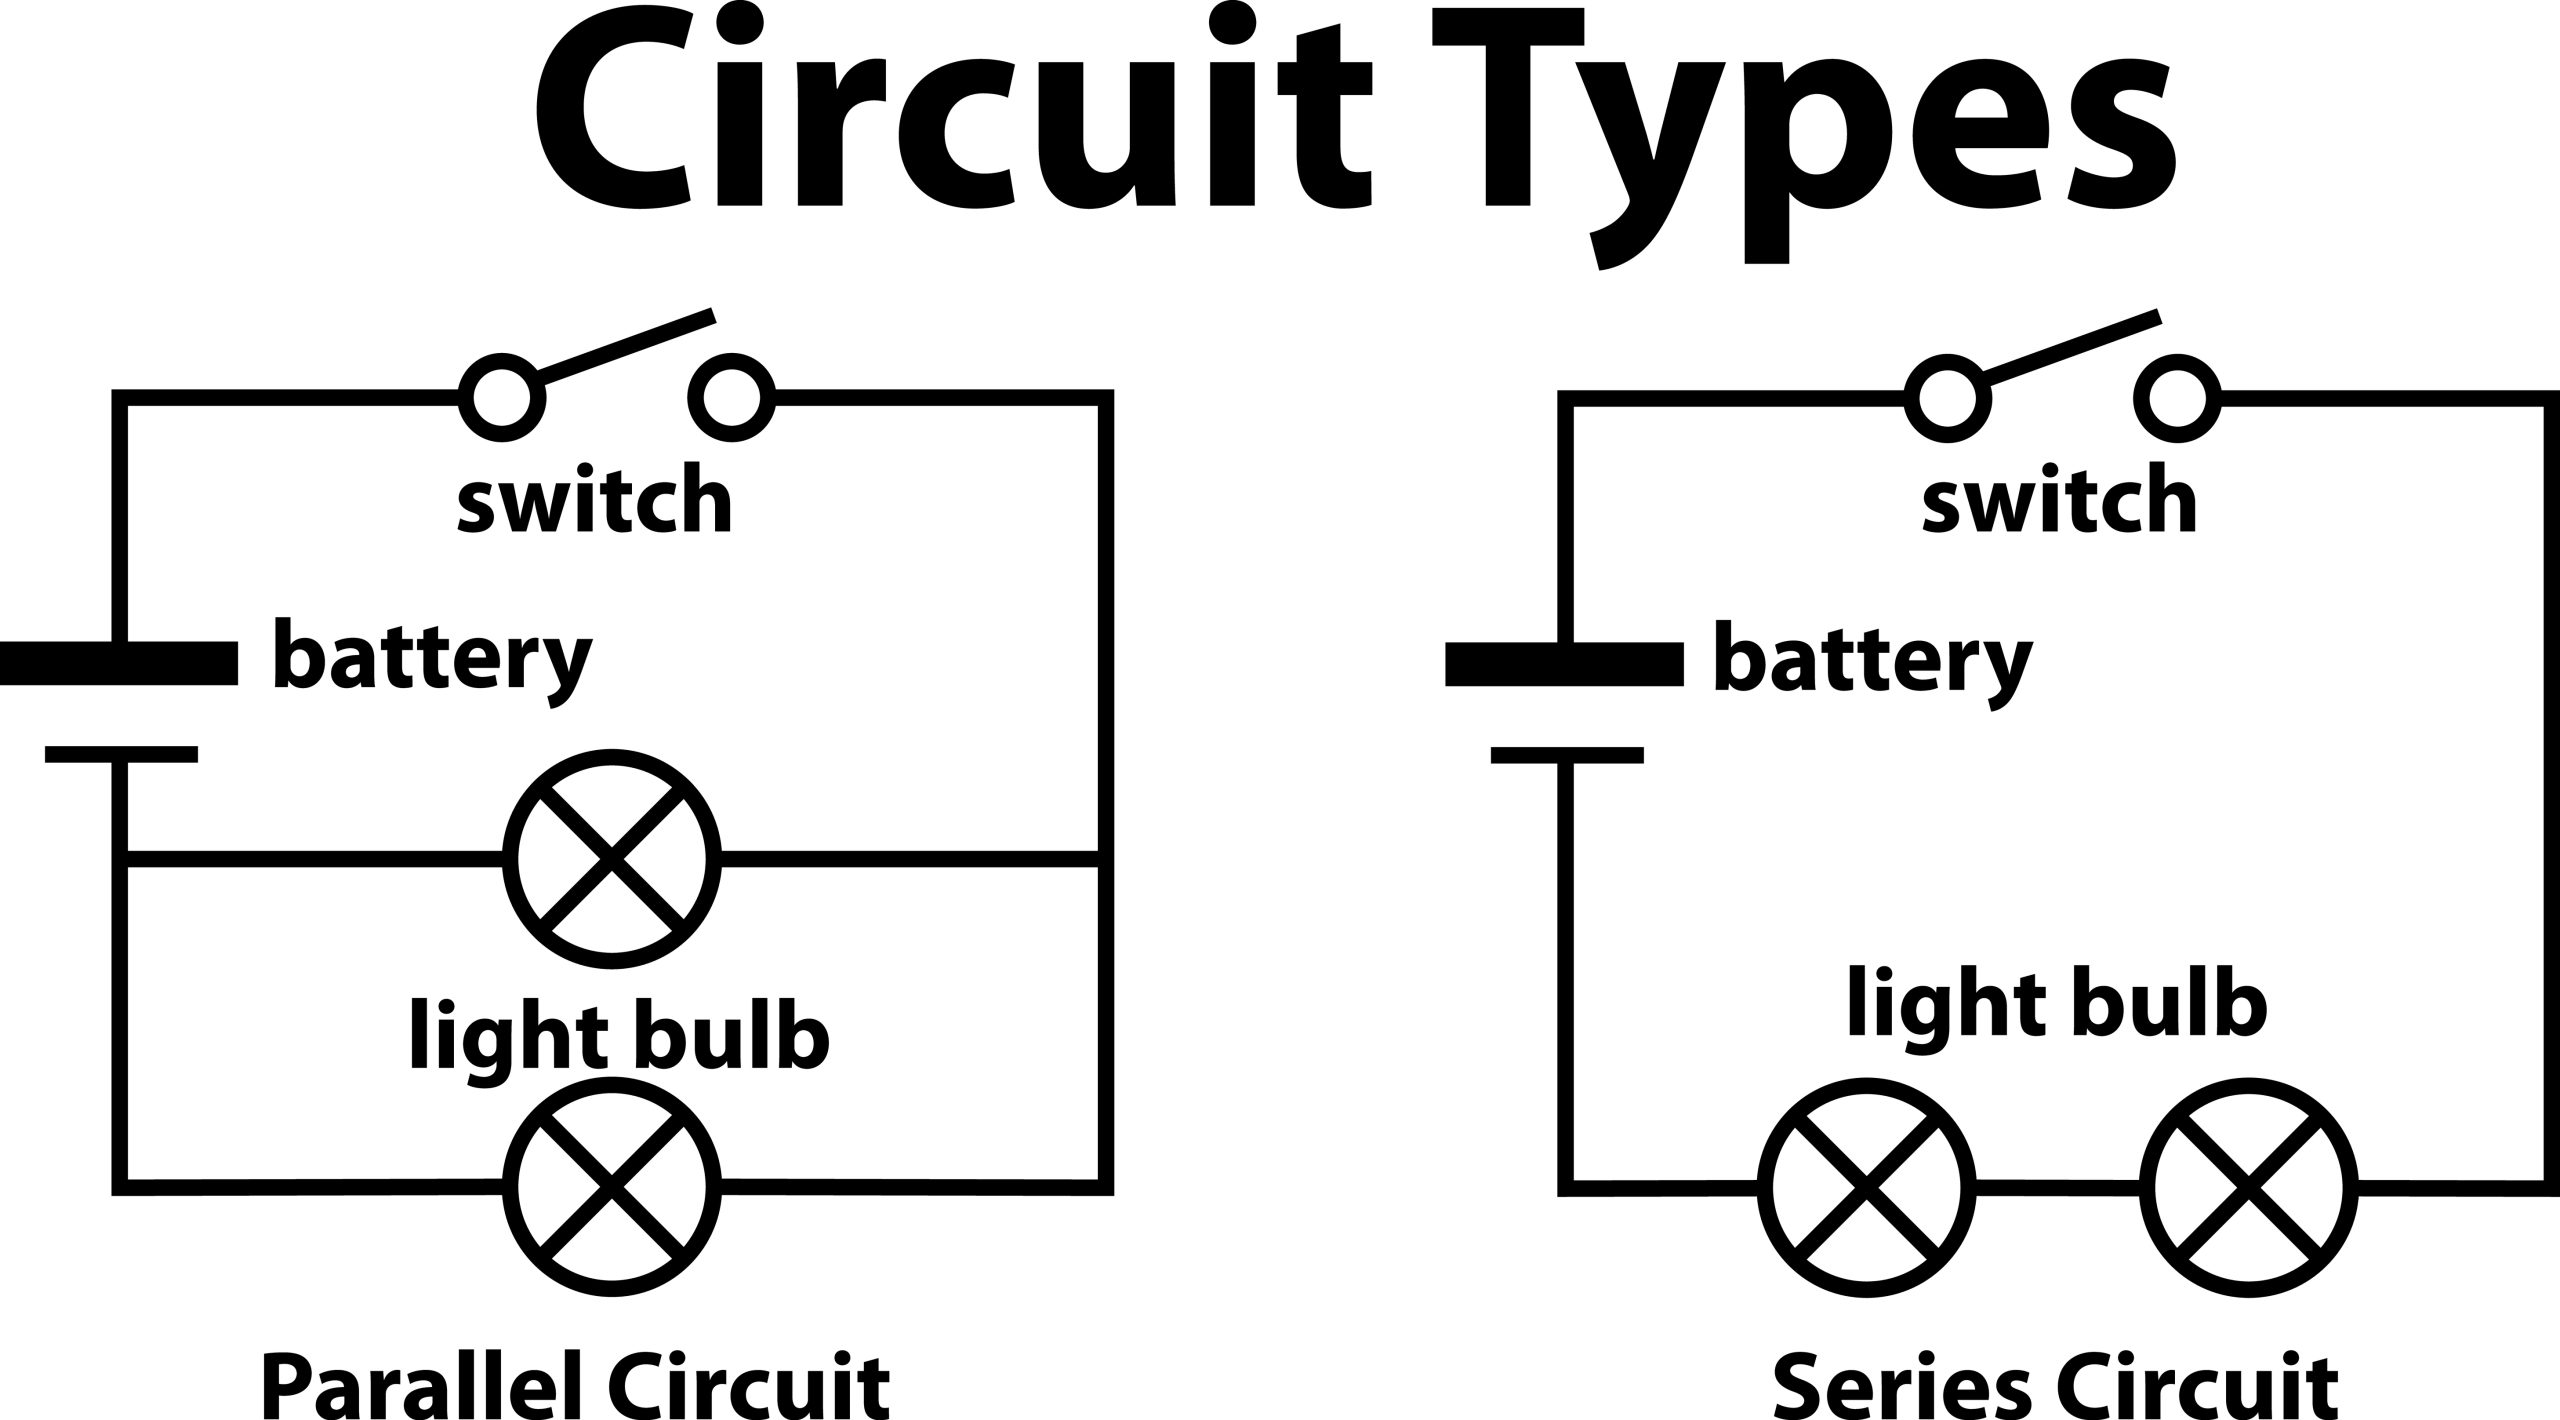
If you’re just getting into electronics, one of the first “big ideas” you’ll run into is that circuits can be wired in series or parallel. The difference isn’t just a vocabulary quiz—it changes how voltage, current, and brightness/power behave, and it affects whether one broken part shuts everything down.
Let’s break it down in plain language, with quick examples you can try on a breadboard.
What a “path” means in a circuit
Think of electricity like cars on a road:
- A series circuit is one road from the battery, through every part, and back to the battery.
- A parallel circuit is multiple roads side-by-side that share the same start (power) and finish (ground).
If you want a super clear refresher on how power moves through a circuit, read Understanding Circuits: How power flows in simple electronics projects.
Series circuits
What series wiring looks like
Battery → component A → component B → component C → back to battery
There is only one path for current.
Key behaviors in series
1) The current is the same through every component
Because there’s only one path, the same “flow” goes through everything in line.
2) The voltage gets divided across components
Your battery provides a total voltage (like 3V, 5V, 9V). In a series chain, that voltage is shared across the components. The more parts you add, the less voltage each part might get (depending on the parts).
3) One break can shut the whole circuit off
If one component fails open (or you remove it), the path is broken—current can’t flow anywhere.
A beginner-friendly series example
Put two LEDs in series (each with proper resistance planning—more on that in a second). Many beginners notice something right away: they may be dimmer than a single LED, especially with low-voltage batteries, because the LEDs “use up” voltage as current passes through them.
Practical tip: Series is common when you want to split voltage, or when you’re chaining components that are designed to run together (like certain LED strips or battery cells).
Parallel circuits
What parallel wiring looks like
Battery → splits into branch 1 (component A) and branch 2 (component B) → branches rejoin → back to battery
There are multiple paths for current.
Key behaviors in parallel
1) Each branch gets the full battery voltage
In parallel, every branch connects across the same power and ground, so each branch “sees” the same voltage.
2) The current splits between branches
Current divides among the branches depending on what’s connected. More branches usually means more total current drawn from the battery.
3) One branch failing usually doesn’t kill the others
If one LED burns out in one branch, the other branch can still work because it still has its own path.
A beginner-friendly parallel example
Wire two LEDs in parallel, but (important!) give each LED its own resistor. This is the most reliable beginner method because each LED branch is controlled and protected.
If you’d like a step-by-step build that’s perfect for practicing branching and component placement, try Your First Breadboard Project: Build a Simple LED Circuit.
Series vs parallel: the quick comparison
Brightness and performance
- Series LEDs (with the right battery voltage) can be efficient, but if the battery voltage is too low, the LEDs can be dim or not light at all.
- Parallel LEDs are usually easier for beginners because each LED gets the same voltage, but the battery drains faster if you add many branches.
Reliability
- Series: one failure can turn everything off.
- Parallel: one failure usually only affects that branch.
Battery drain
- Series: generally draws less current than adding multiple parallel branches (depends on the parts).
- Parallel: adding branches usually increases total current, draining batteries faster.
The biggest beginner mistake: resistors
Whether you build series or parallel LED circuits, resistors matter.
In series
You can sometimes use one resistor for the whole LED chain (depending on the design), because the same current flows through the entire line. But you must calculate it correctly.
In parallel
You should typically use one resistor per LED branch.
Why? Because two “identical” LEDs rarely behave perfectly identically. If one LED has a slightly lower forward voltage, it can steal more current and get brighter (or burn out sooner). A resistor per branch keeps each LED controlled and predictable.
When should you use each?
Use a series circuit when…
- You want a simple “all-or-nothing” chain (one switch controls everything).
- Your power source voltage is high enough to support multiple components in a line.
- You’re learning the concept of voltage drop and current continuity.
Use a parallel circuit when…
- You want multiple parts to run independently.
- You want each component to get full voltage.
- You’re building something like household-style wiring logic (lights/appliances run independently).
Mini challenge: build both on a breadboard
Try this learning exercise:
- Build a single LED circuit (battery + resistor + LED).
- Convert it into a series circuit by adding a second LED in line.
- Convert it into a parallel circuit by splitting into two LED branches (each with its own resistor).
- Observe:
- Which looks brighter?
- Which keeps working if you unplug one LED?
- Does the battery feel like it drains faster in parallel?
That hands-on comparison will make the concept stick fast.
From Simple Circuits to Real-World Power Systems
The same ideas behind series vs parallel circuits are used in homes, cars, and even large power grids. Engineers decide whether systems should behave more like a series chain or a parallel network depending on safety, efficiency, and reliability.
If you’re curious how electricity is distributed on a much larger scale, explore resources from the U.S. Department of Energy to see how power systems are designed and managed.